Arduino Microcontrollers
The complete guide to Arduino boards - from beginner projects to advanced applications

The complete guide to Arduino boards - from beginner projects to advanced applications
Arduino is an open-source electronics platform based on easy-to-use hardware and software. Arduino boards are able to read inputs - light on a sensor, a finger on a button, or a Twitter message - and turn it into an output - activating a motor, turning on an LED, publishing something online.
Arduino offers a wide range of boards with different specifications for various applications. Here are the most popular Arduino boards:
The standard board for beginners with all the basic features
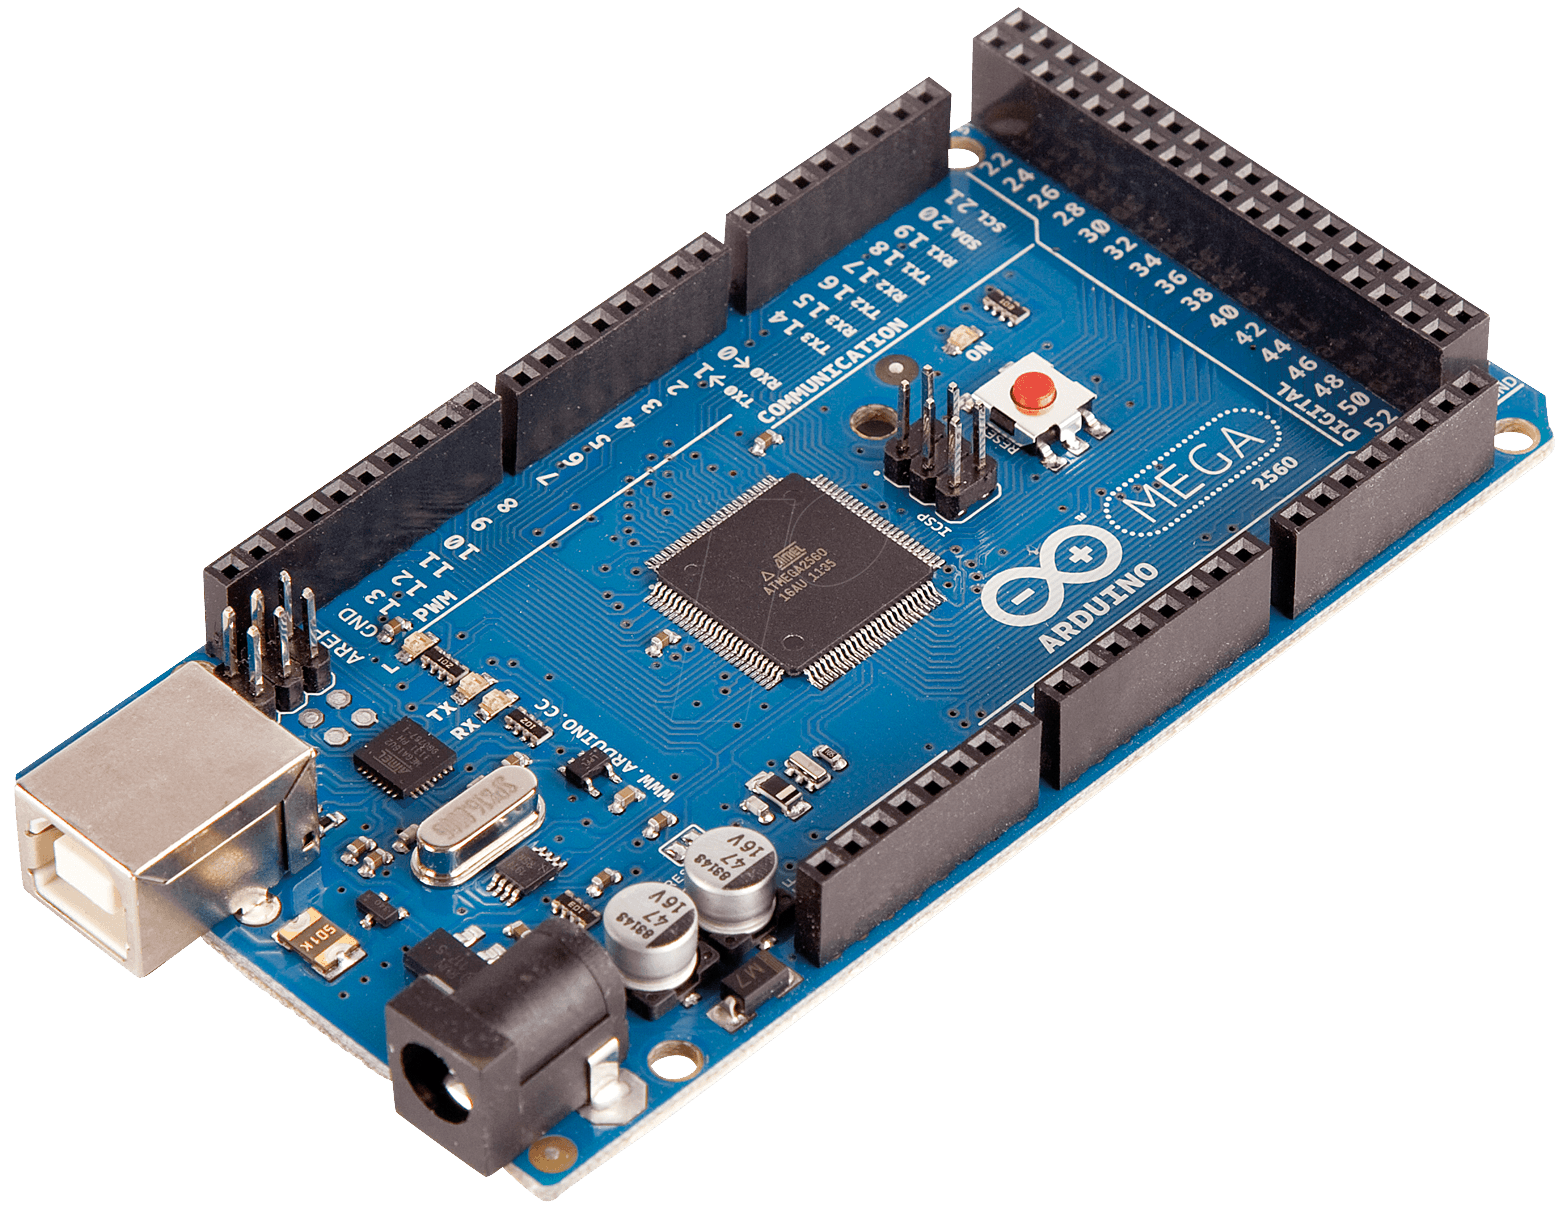
More I/O pins and memory for complex projects
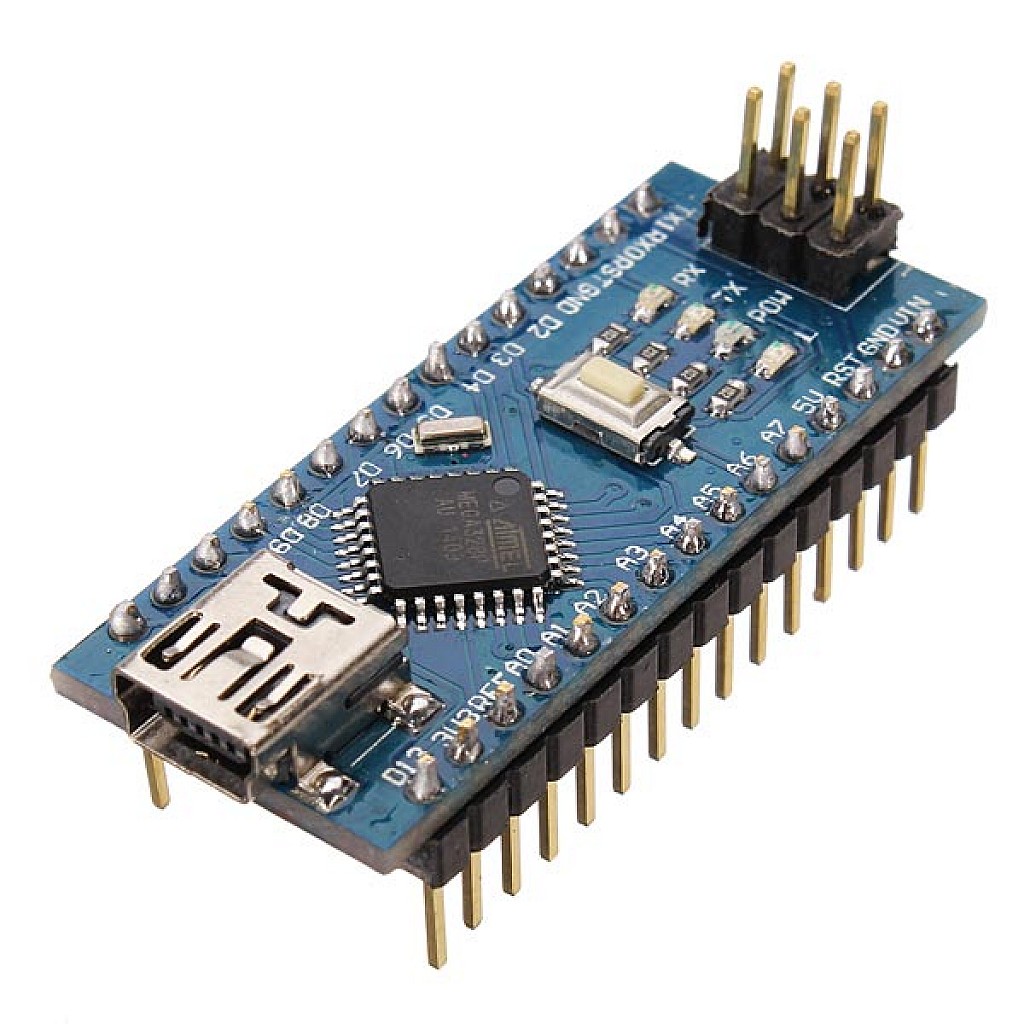
Compact version of the Uno for space-constrained projects
32-bit ARM core for advanced applications
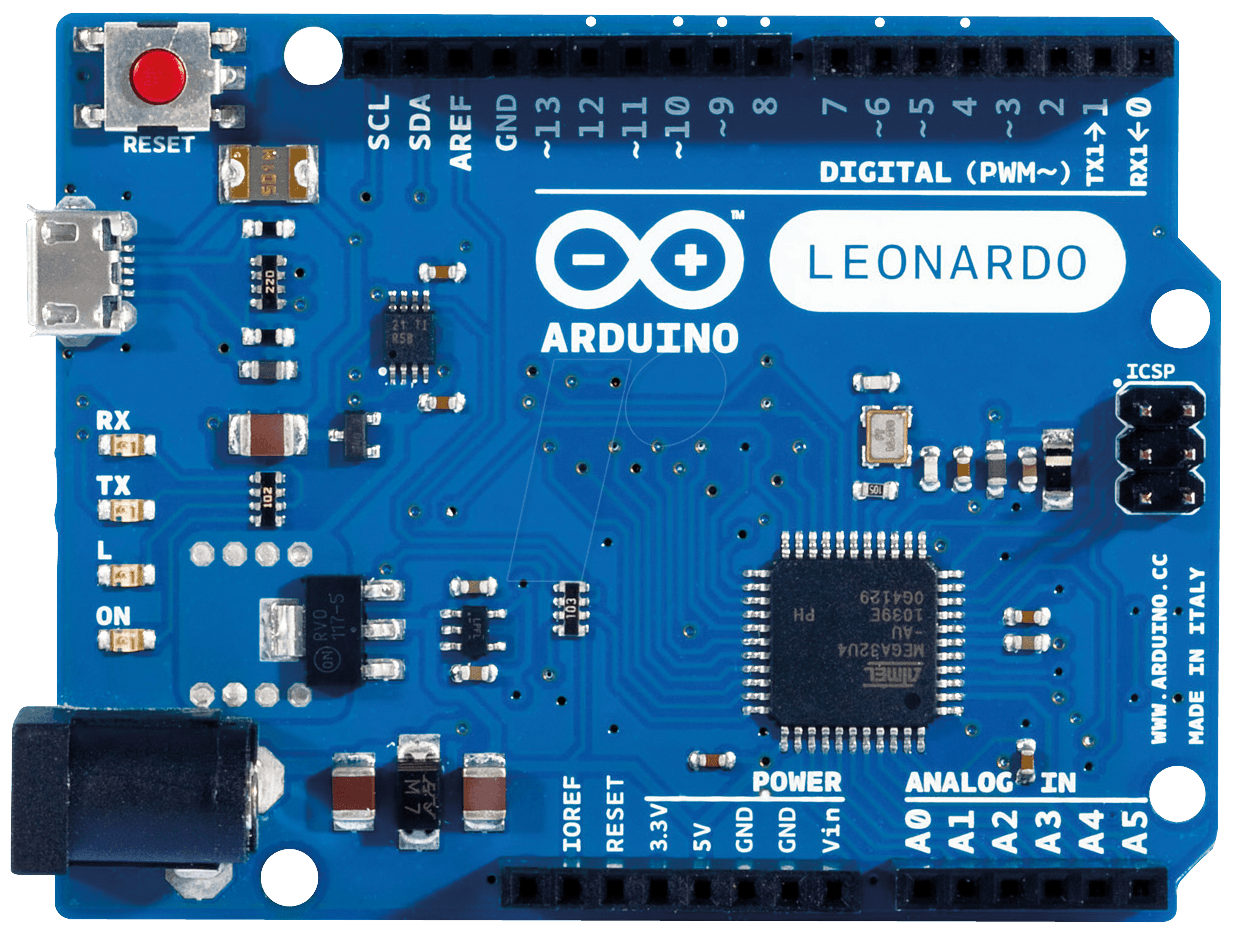
Built-in USB communication for HID devices

IoT-focused boards with various connectivity options
Compare the specifications of different Arduino boards to choose the right one for your project:
| Board | Microcontroller | Clock Speed | Flash Memory | Digital I/O | Analog Inputs | PWM | USB |
|---|---|---|---|---|---|---|---|
| Uno R3 | ATmega328P | 16 MHz | 32 KB | 14 | 6 | 6 | Standard |
| Mega 2560 | ATmega2560 | 16 MHz | 256 KB | 54 | 16 | 15 | Standard |
| Nano | ATmega328P | 16 MHz | 32 KB | 22 | 8 | 6 | Mini |
| Due | ATSAM3X8E | 84 MHz | 512 KB | 54 | 12 | 12 | Micro |
| Leonardo | ATmega32U4 | 16 MHz | 32 KB | 20 | 12 | 7 | Micro (HID) |
| MKR1000 | SAMD21 | 48 MHz | 256 KB | 8 | 7 | 12 | Micro (WiFi) |
The Arduino Uno is the most popular board in the Arduino family and a great choice for beginners. Here's everything you need to know about it:
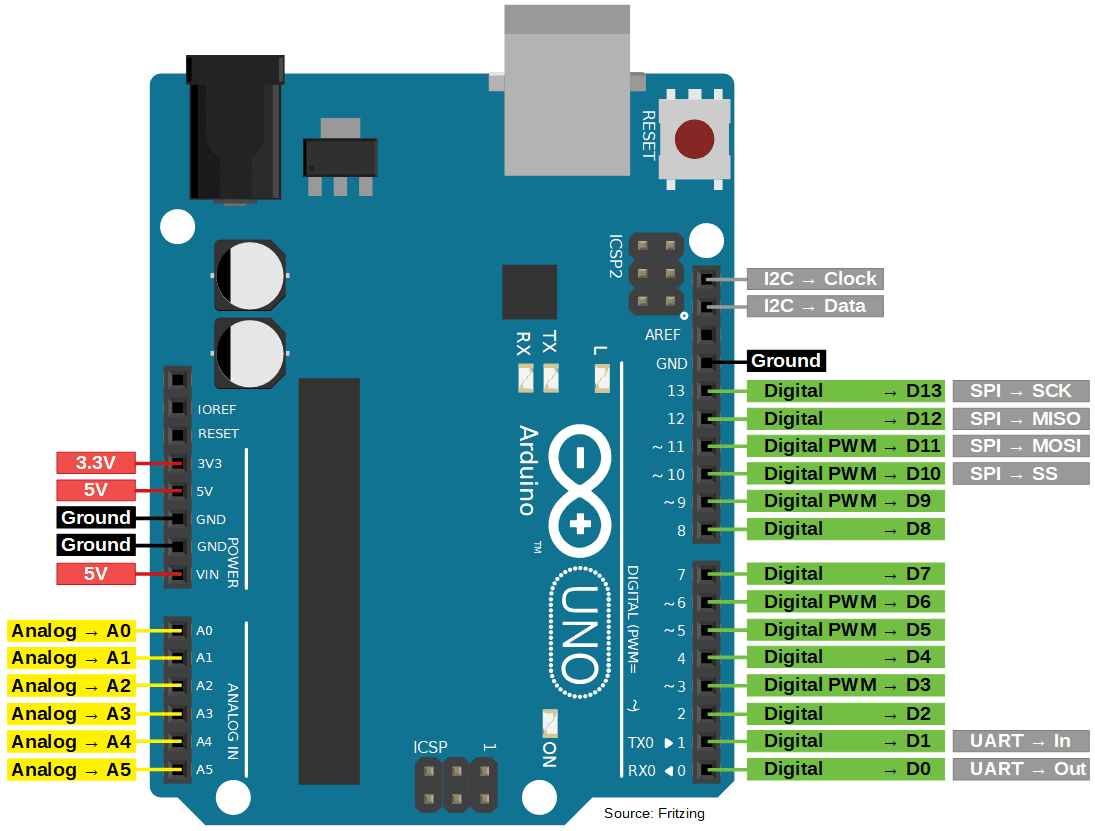
| Pin | Function | Description |
|---|---|---|
| 0 (RX), 1 (TX) | Serial Communication | Used for programming and serial communication |
| 2, 3 | External Interrupts | Can trigger interrupts on change, rising, or falling |
| 3, 5, 6, 9, 10, 11 | PWM Output | Analog output using pulse-width modulation |
| 10 (SS), 11 (MOSI), 12 (MISO), 13 (SCK) | SPI Communication | Used for SPI communication with peripherals |
| A4 (SDA), A5 (SCL) | I2C Communication | Used for I2C communication with sensors |
| A0-A5 | Analog Input | 10-bit ADC inputs (0-5V) |
| 5V, 3.3V | Power Output | Provide regulated power to components |
| GND | Ground | Common ground for circuits |
The Arduino Uno is programmed using the Arduino IDE, which is based on C/C++. Here's a simple example sketch:
void setup() {
    // Initialize digital pin LED_BUILTIN as an output
    pinMode(LED_BUILTIN, OUTPUT);
}

void loop() {
    // Turn the LED on (HIGH is the voltage level)
    digitalWrite(LED_BUILTIN, HIGH);
    // Wait for a second
    delay(1000);
    // Turn the LED off by making the voltage LOW
    digitalWrite(LED_BUILTIN, LOW);
    // Wait for a second
    delay(1000);
}The Arduino Uno can be powered in several ways:
Once you've mastered the basics, these advanced concepts will help you take your Arduino projects to the next level:
Interrupts allow the Arduino to respond immediately to important events while performing other tasks:
volatile int state = LOW;

void setup() {
    pinMode(13, OUTPUT);
    attachInterrupt(0, blink, CHANGE);  // Interrupt on pin 2 (interrupt 0)
}

void loop() {
    // Main program continues to run
}

void blink() {
    state = !state;
    digitalWrite(13, state);
}Reduce power consumption for battery-powered projects:
// Put Arduino to sleep and wake on interrupt
#include <avr/sleep.h>

void setup() {
    pinMode(2, INPUT_PULLUP);
    attachInterrupt(0, wakeUp, LOW);
}

void loop() {
    set_sleep_mode(SLEEP_MODE_PWR_DOWN);
    sleep_enable();
    sleep_mode();  // Arduino sleeps here
    // Execution resumes here after wake-up
    sleep_disable();
    // Do something after waking
}

void wakeUp() {
    // Just a handler for the interrupt
}Optimize memory usage for complex projects:
Extend Arduino functionality with libraries:
// Example using the Adafruit NeoPixel library
#include <Adafruit_NeoPixel.h>

// Parameter 1 = number of pixels in strip
// Parameter 2 = Arduino pin number
// Parameter 3 = pixel type flags
Adafruit_NeoPixel strip = Adafruit_NeoPixel(60, 6, NEO_GRB + NEO_KHZ800);

void setup() {
    strip.begin();
    strip.show();  // Initialize all pixels to 'off'
}

void loop() {
    // Some example procedures showing how to control the strip
    colorWipe(strip.Color(255, 0, 0), 50);  // Red
    colorWipe(strip.Color(0, 255, 0), 50);  // Green
    colorWipe(strip.Color(0, 0, 255), 50);  // Blue
}